MQTT
We use MQTT as the protocol to connect all system components.
MQTT Broker
Install Mosquitto on a Raspberry Pi
Mosquitto Broker
sudo apt-get install mosquitto
sudo apt-get install mosquittoMosquitto Command-Line Clients
sudo apt-get install mosquitto-clients
sudo apt-get install mosquitto-clientsTesting Mosquitto
You can now try to subscribe to a topic
mosquitto_sub -d -t example_topic
mosquitto_sub -d -t example_topicand publish something on that topic:
mosquitto_pub -d -t example_topic -m "Time for a coffee"
mosquitto_pub -d -t example_topic -m "Time for a coffee"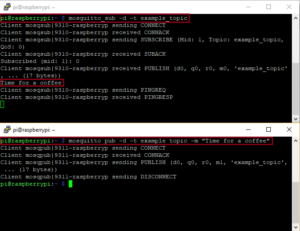
Enabling Websockets
If you want to connect to the MQTT broker also via MQTT over websockets (usually from Javascript) then you need to enable Websockets. For that, create a file called mosquitto.conf in the folder /etc/mosquitto/conf.d and add the follwing lines:
listener 1883
protocol mqtt

listener 1884
protocol websockets
NTNU MQTT Broker
We have setup an MQTT broker with the address mqtt20.iik.ntnu.no. It is configured with the default ports 1883 for connections via TCP and 1884 for connections via websockets.
listener 1883
protocol mqtt

listener 1884
protocol websockets
MQTT in Python
After setting up your broker, you can easily make use MQTT in Python with the paho-mqtt package. To install this package with pip, use the command:
python -m pip install paho-mqtt
We can now make a simple script that is able to publish information on a topic, to the broker:
import paho.mqtt.client as mqtt
port=1883

def on_publish(client,userdata,result):
    print("data published \n")
    pass

client1= mqtt.Client("test1")
client1.on_publish = on_publish
client1.connect(broker,port)
ret= client1.publish("mqtt_test","The broker is working properly")
import paho.mqtt.client as mqtt
port=1883

def on_publish(client,userdata,result):
    print("data published \n")
    pass

client1= mqtt.Client("test1")
client1.on_publish = on_publish
client1.connect(broker,port)
ret= client1.publish("mqtt_test","The broker is working properly")
Now we need a subscriber to connect to the broker and recieve the messages we publish:
import paho.mqtt.client as mqtt
    def on_connect(client, userdata, flags, rc):
    print("Connected with result code "+str(rc))

client.subscribe("mqtt_test/#")
def on_message(client, userdata, msg):
    print("Topic: " + msg.topic)
    print("Message: " + str(msg.payload))

client = mqtt.Client()
client.on_connect = on_connect
client.on_message = on_message

client.connect("192.168.10.168", 1883, 60)

client.loop_forever()
More information on the paho package can be found here: https://pypi.python.org/pypi/paho-mqtt/
If there is an error in the on_message() function, you may not see an error and nothing is happening, and it may look as if the client doesn't receive any messages. To prevent such errors, add a print('Message received!') line at the start of the message so you see it was called. Make sure this first statement does not have any problems (like unknown variables) so that it does not fail.
You can also place any code that could cause an error into a try: ... except: block to handle any exceptions locally.
Subscribe to system messages
client.subscribe("$SYS/#")
Debugging With MQTTX
MQTTX is a desktop application that connects to an MQTT broker and that can publish and subscribe to arbitrary topics. This is a very tool useful during development. Essentially, MQTTX is a MQTT client, and can as such connect to an MQTT broker, subscribe to topics and send messages to topics. This does not sound like much. However, MQTTX has a generic user interface, you can use MQTTX while you construct your application to see how the other system components publish messages, and you can also "inject" messages into the system, by publishing to any topic you want. Using MQTTX is really simple, but because we have now talked about brokers, clients, publishers and subscribers, you may loose track and wonder what this MQTTX does: Think of it as a debugger for MQTT, and you can use it like Wireshark. Once the system is done, you don't need MQTTX anymore.
Install MQTTX.
Connecting to a Broker
- Start MQTTX
- Add a connection by clicking on the
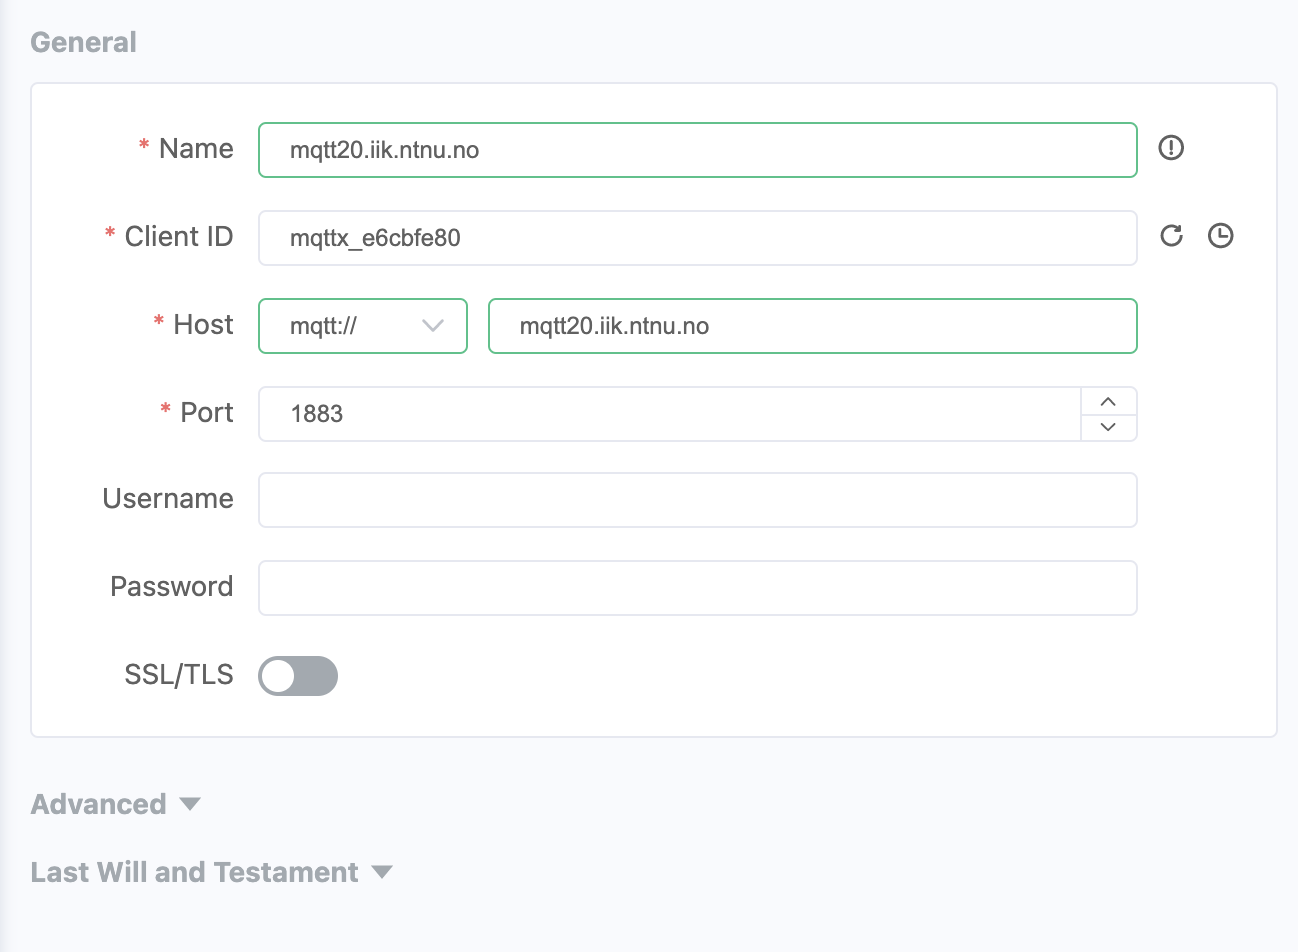
+button. Enter the addressmqtt20.iik.ntnu.noas hostname. Protocolmqtt://is already set by default, and our port should be1883. As name you can use the same as the hostname. - Click on
Connect
You should get a green "Connected" message. If not, our broker might be down (contact me then) or you are not connected to the internet.
Publishing a Message
Once you are connected to a broker, and the broker is selected in the list to the left, you can publish a message to a topic using the interface in the lower right corner.
- Write the topic in the field with the grey label
Topic - Optionally select the QoS level.
- In the text field below the topic you can write the payload of the message, and MQTTX gives you the possibility to show it as Plaintext or JSON (these two options are most suitable for us).
- Click the send symbol on the lower right corner.
Subscribing to a Topic
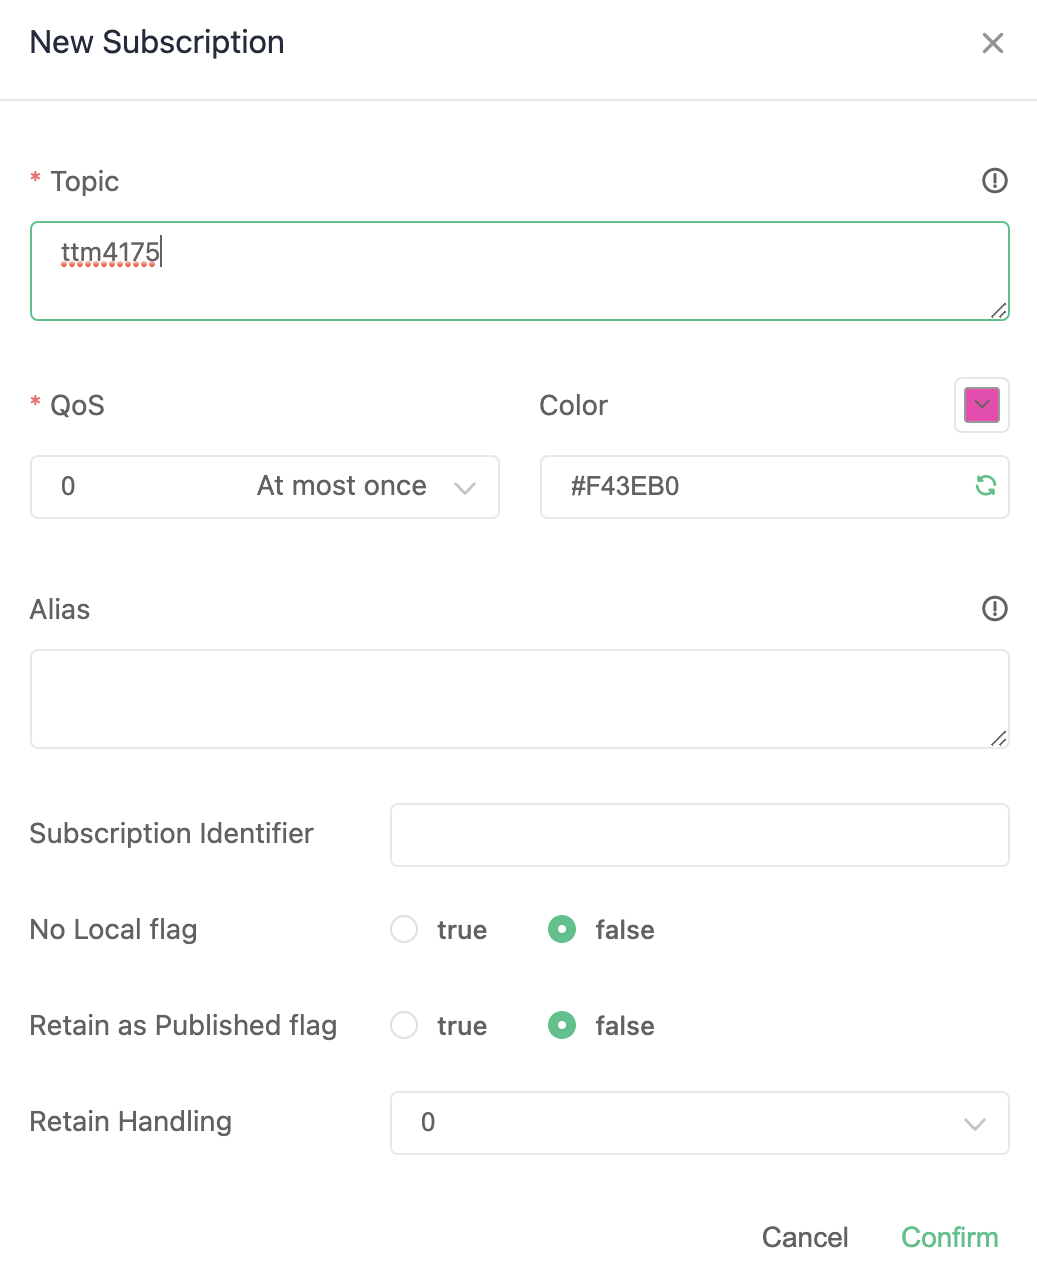
- Once you are connected, click on
+ New Subscription - Enter the topic. Include wildcards
+and#as you need. - Set the QoS (default is 0)
- Click on
Confirm
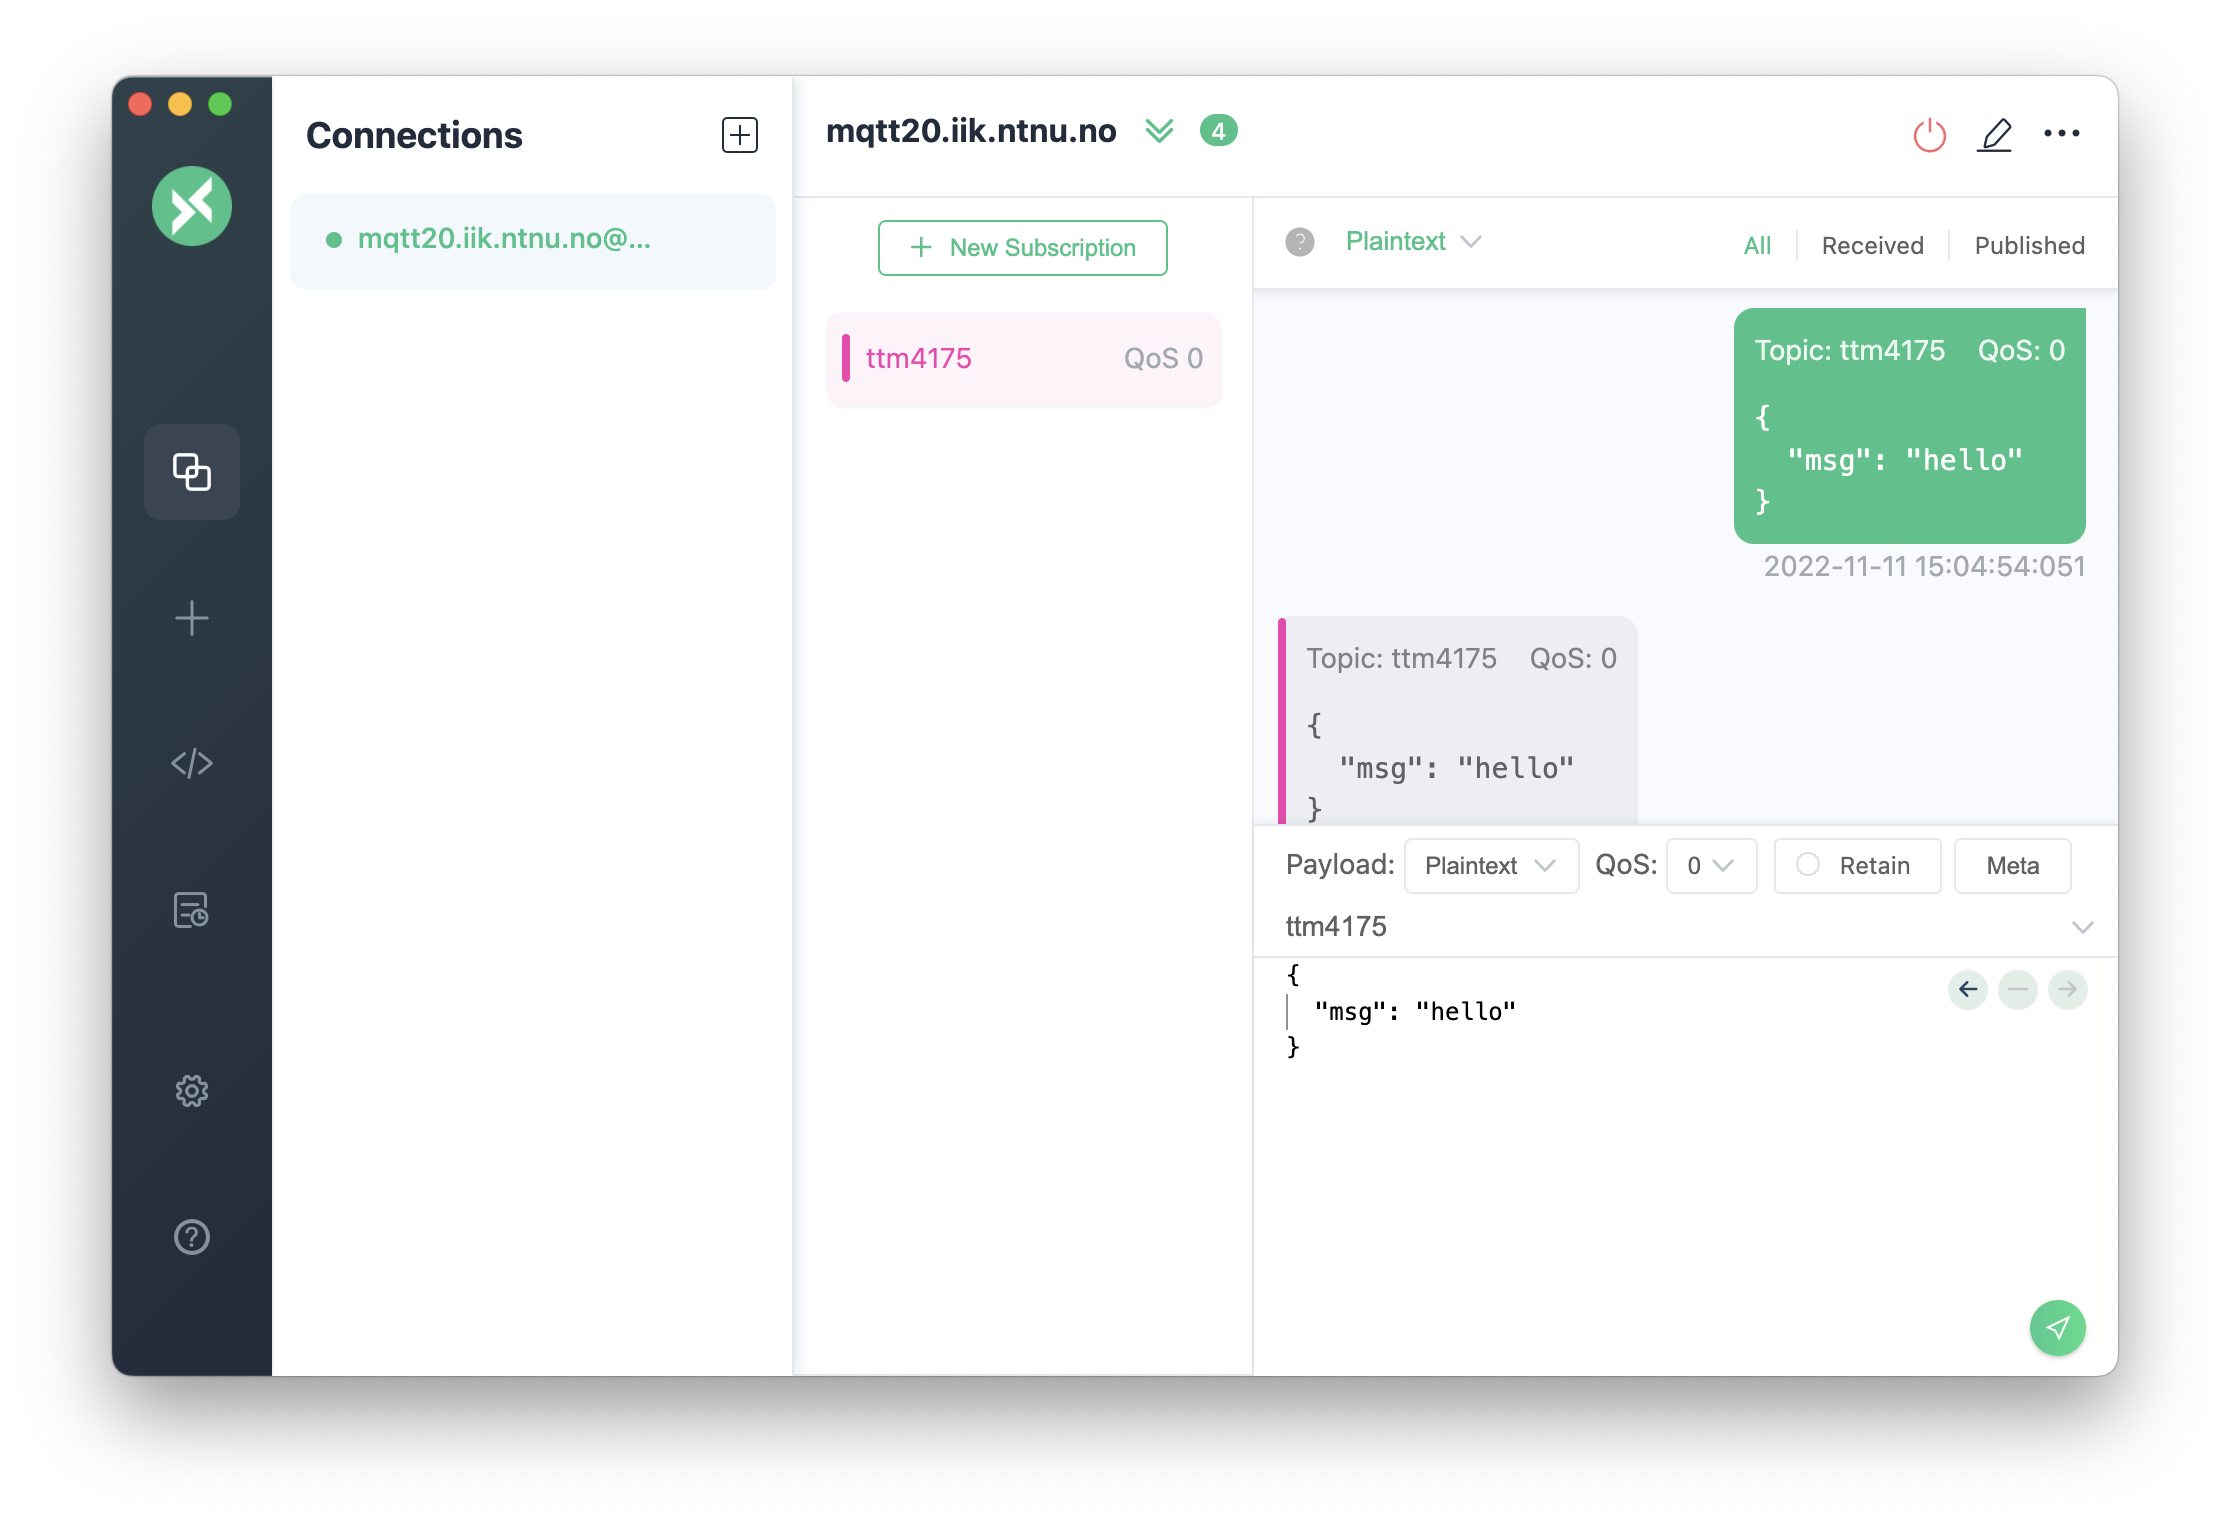
You should now be subscribed to a topic. You can test this by sending a message as described above to that topic. You should then see that you have both sent and received that message in the conversation window.
Subscribe to a topic and then publish a message to that topic, so that you can see that it is sent back to you like in the screenshot above.
Observing Communication
Because MQTT uses the publish-subscribe pattern, the MQTTX can simply subscribe to any topics that are interesting in your application and you can see which messages are sent to these topics, without disturbing the communication in the system.