User Interfaces
User interfaces are a critical part for many systems, as they should present the system functionality to the user in an intuitive way and provide the appropriate level of information. Making such good interfaces is a topic on its own, and not part of the learning goals of this course, where we focus more on the overall system design and the interactions between components.
What we do care about is to make user-friendly systems, and we want to ensure that systems fulfill user requirements. As we treat communication between components, we also care about responsive user interfaces, that means, that the user is informed what at each stage of an interaction happens and we don't leave them waiting with an unresponsive progress bar. Or even worse, we don't even show a progress bar and the user does not know if the system has an error or is indeed working on something. But, as said, we don't care if our user interfaces look very polished or use nice animations. This is part of other courses.
In our base architecture, we will use simple uses interfaces with three goals:
- As a source of user events and data. For example, a user interface may represent a mobile application or a website.
- As a replacement for real hardware. For example, a user interface may represent the button and LEDs and plug of the kitchen timer, so we don't have to work with the real hardware.
- As a debugging tool to simulate other devices.
AppJar
As user interface for Python, we are going to use a simple library called appJar. It is an open-source library for Python that runs on the main operating systems and should be robust to install and use. It's a very simple UI library, and not suitable for professional applications. But for learning together, it is exactly what we need.
Install AppJar
pip3 install appJar
pip3 install appJarExample
The code below shows a small example with some of the elements:
from appJar import gui

app = gui()
app.addLabelEntry('Text')
app.setEntry('Text', 'Frank')

def on_button_pressed(title):
    print('Button with title "{}" pressed!'.format(title))
    text = app.getEntry('Text')
    print('And the current text field shows "{}".'.format(text))

app.addButton("Press Button", on_button_pressed)
app.go()
Documentation
State Machines and GUI
To connect the user interface with a state machine, there are two directions we need to take care of:
- From the user interface to the state machines
- From the state machines to the user interface.
User Interface to State Machine
User events can happen at any time, whenever the user decides to do so. The best way to handle these events is by using messages that we send into the state machine.
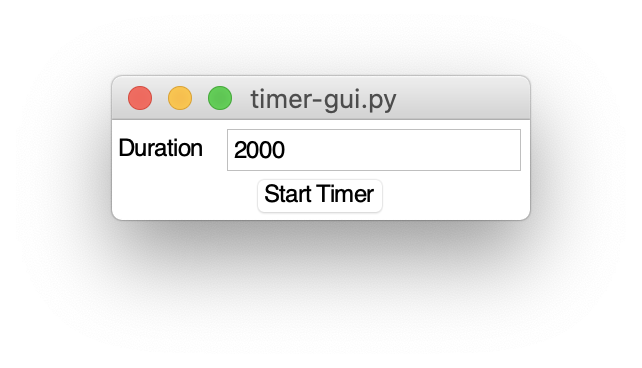
The example below shows a button. It declares a function that is executed once the button is pressed. This function sends the message activate directly into the state machine, using the variable stm.
The corresponding transition is t1, which is then triggered and has the startTimer function as an effect.
The timer function uses the signature start_timer(*) with the * that tells the machine to use the arguments provided by the message.
The send message provides these arguments with the line self.stm.send('activate', args=['t', duration])
Note that we are casting the string of the text field as an integer (with int(...)) in the line above.
When you run the system, look at the command line and the printed statements. You can vary the timer expiration with the text field.
from appJar import gui
from stmpy import Machine, Driver

class TimerGUI():
    def __init__(self):
        self.app = gui()
        self.app.addLabelEntry('Duration')
        self.app.setEntry('Duration', '2000')
        def on_button_pressed(title):
            print('Button with title "{}" pressed!'.format(title))
            duration = int(self.app.getEntry('Duration'))
            self.stm.send('activate', args=['t', duration])
        self.app.addButton("Start Timer", on_button_pressed)

    def printx(self, what):
        print(what)

t0 = {'source': 'initial', 'target': 'off'}
t1 = {'trigger': 'activate', 'source': 'off', 'target': 'active', 'effect': 'start_timer(*)'}
t2 = {'trigger': 't', 'source': 'active', 'target': 'off', 'effect': 'printx("Timeout")'}

timer_gui = TimerGUI()
stm_timer = Machine(name='stm_timer', transitions=[t0, t1, t2], obj=timer_gui)
timer_gui.stm = stm_timer
driver = Driver()
driver.add_machine(stm_timer)
driver.start()

timer_gui.app.go()
State Machine to User Interface
Above you have seen that we created class TimerGUI. In that class we can also place function that manipulate widgets of the user interface, such as replacing a text or switching an image.
For images, for example, two functions are useful:
self.app.addImage(id, file, row, column)creates an image and draws it. The image is loaded from the provided file path. Ideally, this is agifimage. The id for the image is a string that we can later use ro replace the image. The row and column are layou coordinates on a grid layout.self.app.setImage(id, file)replaces an existing image with an id with another file.
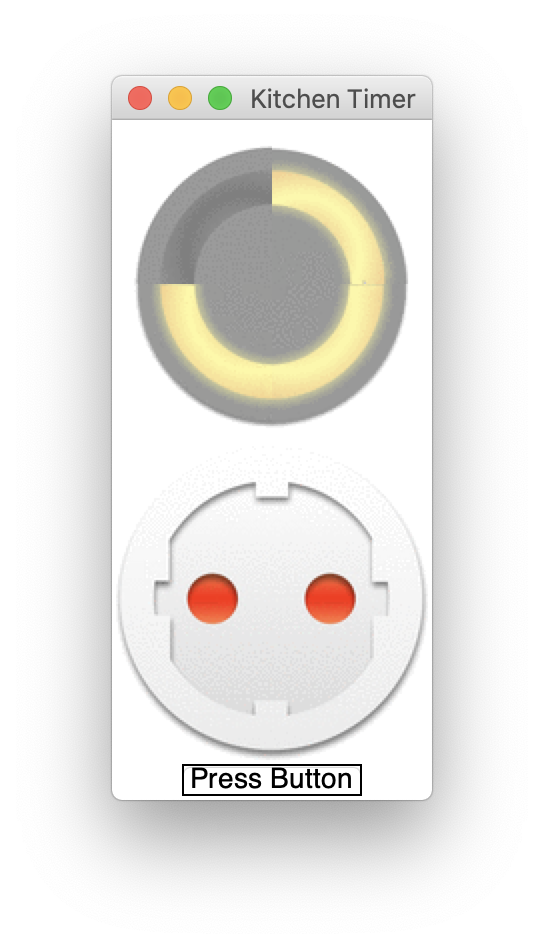
Kitchen Timer Example
You can download a zip file with the kitchen timer and all gif images. It uses a grid layout to align all the quaters of the clock in two columns so that they can be individually switched on and off.
from appJar import gui
from stmpy import Machine, Driver

class KitchenTimer:

    def __init__(self):
        self.app = gui("Kitchen Timer", "160x340")
        self.app.setFont(14)
        self.app.addImage("x60", "timer/60_0.gif", 0, 0)
        self.app.addImage("x15", "timer/15_0.gif", 0, 1)
        self.app.addImage("x30", "timer/30_0.gif", 1, 1)
        self.app.addImage("x45", "timer/45_0.gif", 1, 0)
        self.app.addImage("plug", "timer/plug_off.gif", 2, 0, 2, 2)
        def press(button):
            self.stm.send('switch')
        self.app.addButton("Press Button", press, 4, 0, 2, 1)
        def terminate():
            self.stm.terminate()
            return True
        self.app.setStopFunction(terminate)

    def switch_led(self, led, brightness):
        self.app.setImage('x{}'.format(led), 'timer/{}_{}.gif'.format(led, brightness))

    def switch_plug(self, on):
        if on:
            self.app.setImage('plug', "timer/plug_on.gif")
        else:
            self.app.setImage('plug', "timer/plug_off.gif")


t0 = {'source': 'initial', 'target': 'off'}
t1 = {'trigger': 'switch', 'source': 'off', 'target': 's15'}
t2 = {'trigger': 'switch', 'source': 's15', 'target': 's30'}
t3 = {'trigger': 'switch', 'source': 's30', 'target': 's45'}
t4 = {'trigger': 'switch', 'source': 's45', 'target': 's60'}
t5 = {'trigger': 'switch', 'source': 's60', 'target': 'off'}

tt1 = {'trigger': 't', 'source': 's15', 'target': 'off', 'effect': 'switch_led("15", "0")'}
tt2 = {'trigger': 't', 'source': 's30', 'target': 's15', 'effect': 'switch_led("30", "0")'}
tt3 = {'trigger': 't', 'source': 's45', 'target': 's30', 'effect': 'switch_led("45", "0")'}
tt4 = {'trigger': 't', 'source': 's60', 'target': 's45', 'effect': 'switch_led("60", "0")'}

off = {'name': 'off',
      'entry': 'switch_plug(False); switch_led("15", "0"); switch_led("30", "0"); switch_led("45", "0"); switch_led("60", "0")',
      'exit': 'switch_plug(True)'}

s15 = {'name': 's15',
      'entry': 'start_timer("t", 5000); start_timer("t1", 1000); switch_led("15", "1")',
      't1': 'switch_led("15", "2"); start_timer("t2", 1000)',
      't2': 'switch_led("15", "1"); start_timer("t1", 1000)'}

s30 = {'name': 's30',
      'entry': 'start_timer("t", 5000); start_timer("t1", 1000); switch_led("15", "1"); switch_led("30", "1")',
      't1': 'switch_led("30", "2"); start_timer("t2", 1000)',
      't2': 'switch_led("30", "1"); start_timer("t1", 1000)'}

s45 = {'name': 's45',
      'entry': 'start_timer("t", 5000); start_timer("t1", 1000); switch_led("30", "1"); switch_led("45", "1")',
      't1': 'switch_led("45", "2"); start_timer("t2", 1000)',
      't2': 'switch_led("45", "1"); start_timer("t1", 1000)'}

s60 = {'name': 's60',
      'entry': 'start_timer("t", 5000); start_timer("t1", 1000); switch_led("45", "1"); switch_led("60", "1")',
      't1': 'switch_led("60", "2"); start_timer("t2", 1000)',
      't2': 'switch_led("60", "1"); start_timer("t1", 1000)'}

k = KitchenTimer()

stm_kitchen = Machine(name='stm_kitchen', transitions=[t0, t1, t2, t3, t4, t5, tt1, tt2, tt3, tt4], obj=k, states=[off, s15, s30, s45, s60])
k.stm = stm_kitchen
driver = Driver()
driver.add_machine(stm_kitchen)
driver.start()

k.app.go()